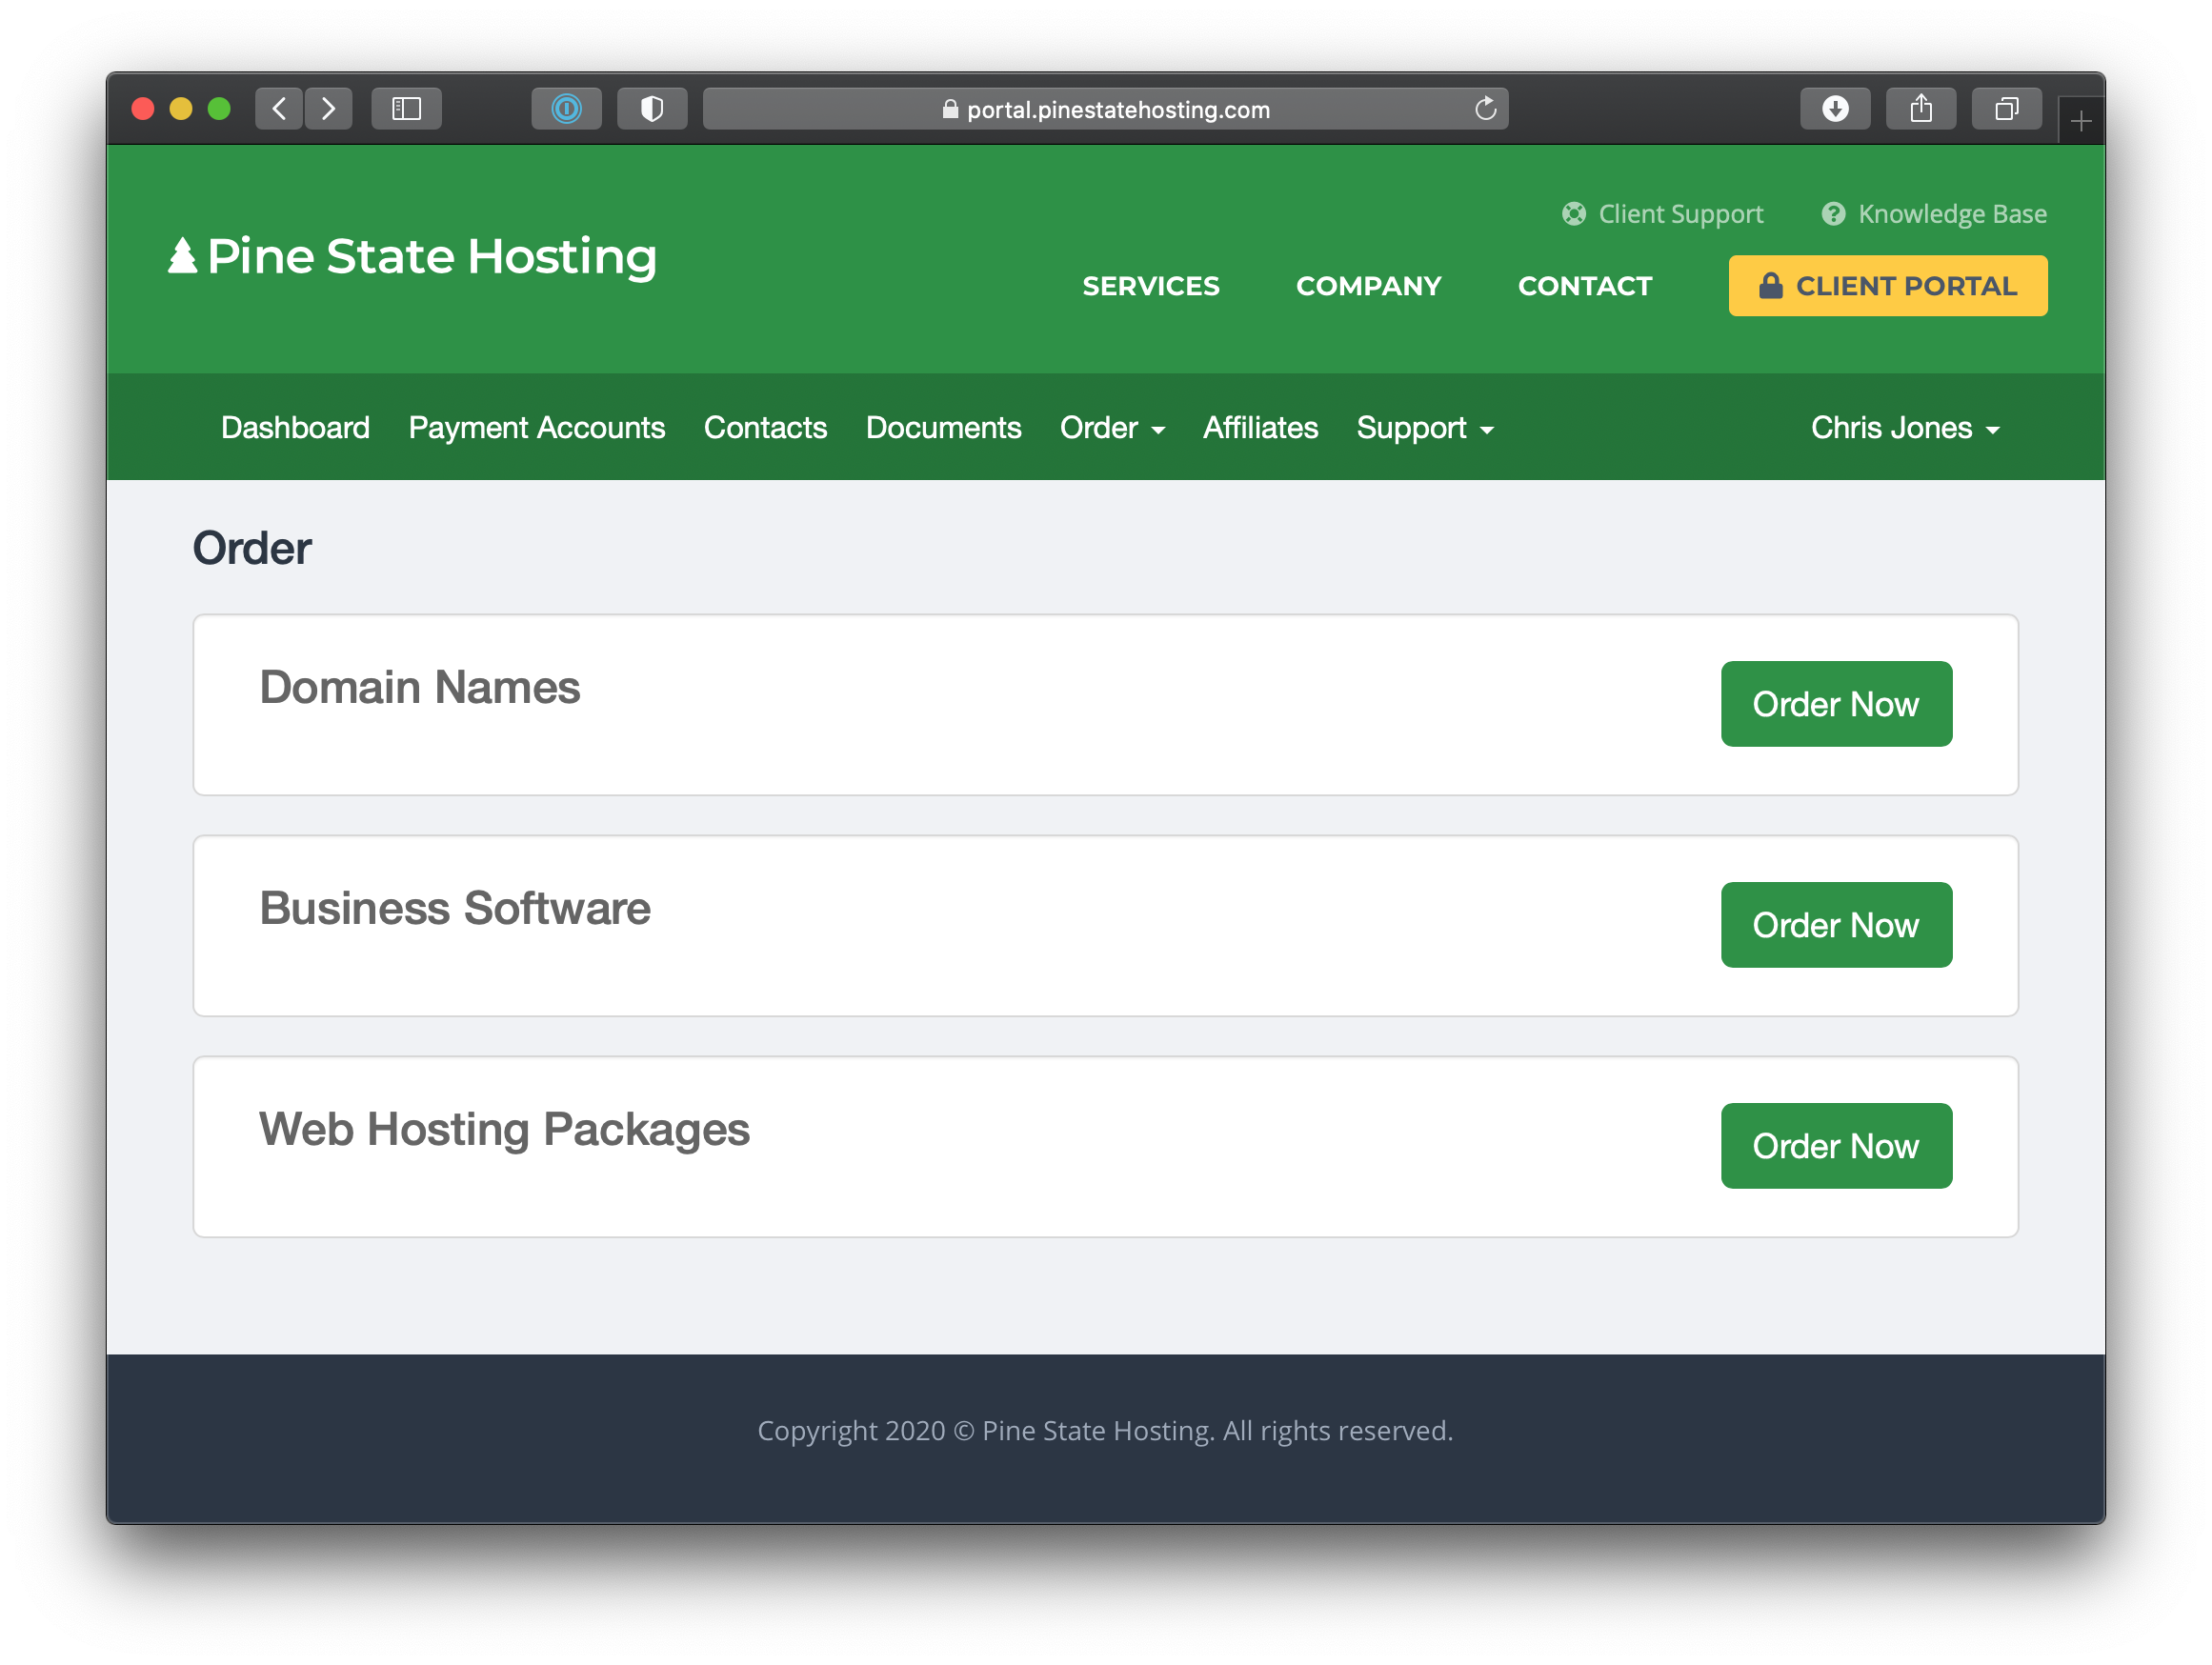
The easiest way to get started with a new Shared Web Hosting account is to order a web hosting package in the client area. Once you've signed up as a new client, click on the "Order" button in the top navigation bar. Next to Web Hosting Packages click on the green "Order Now" button.
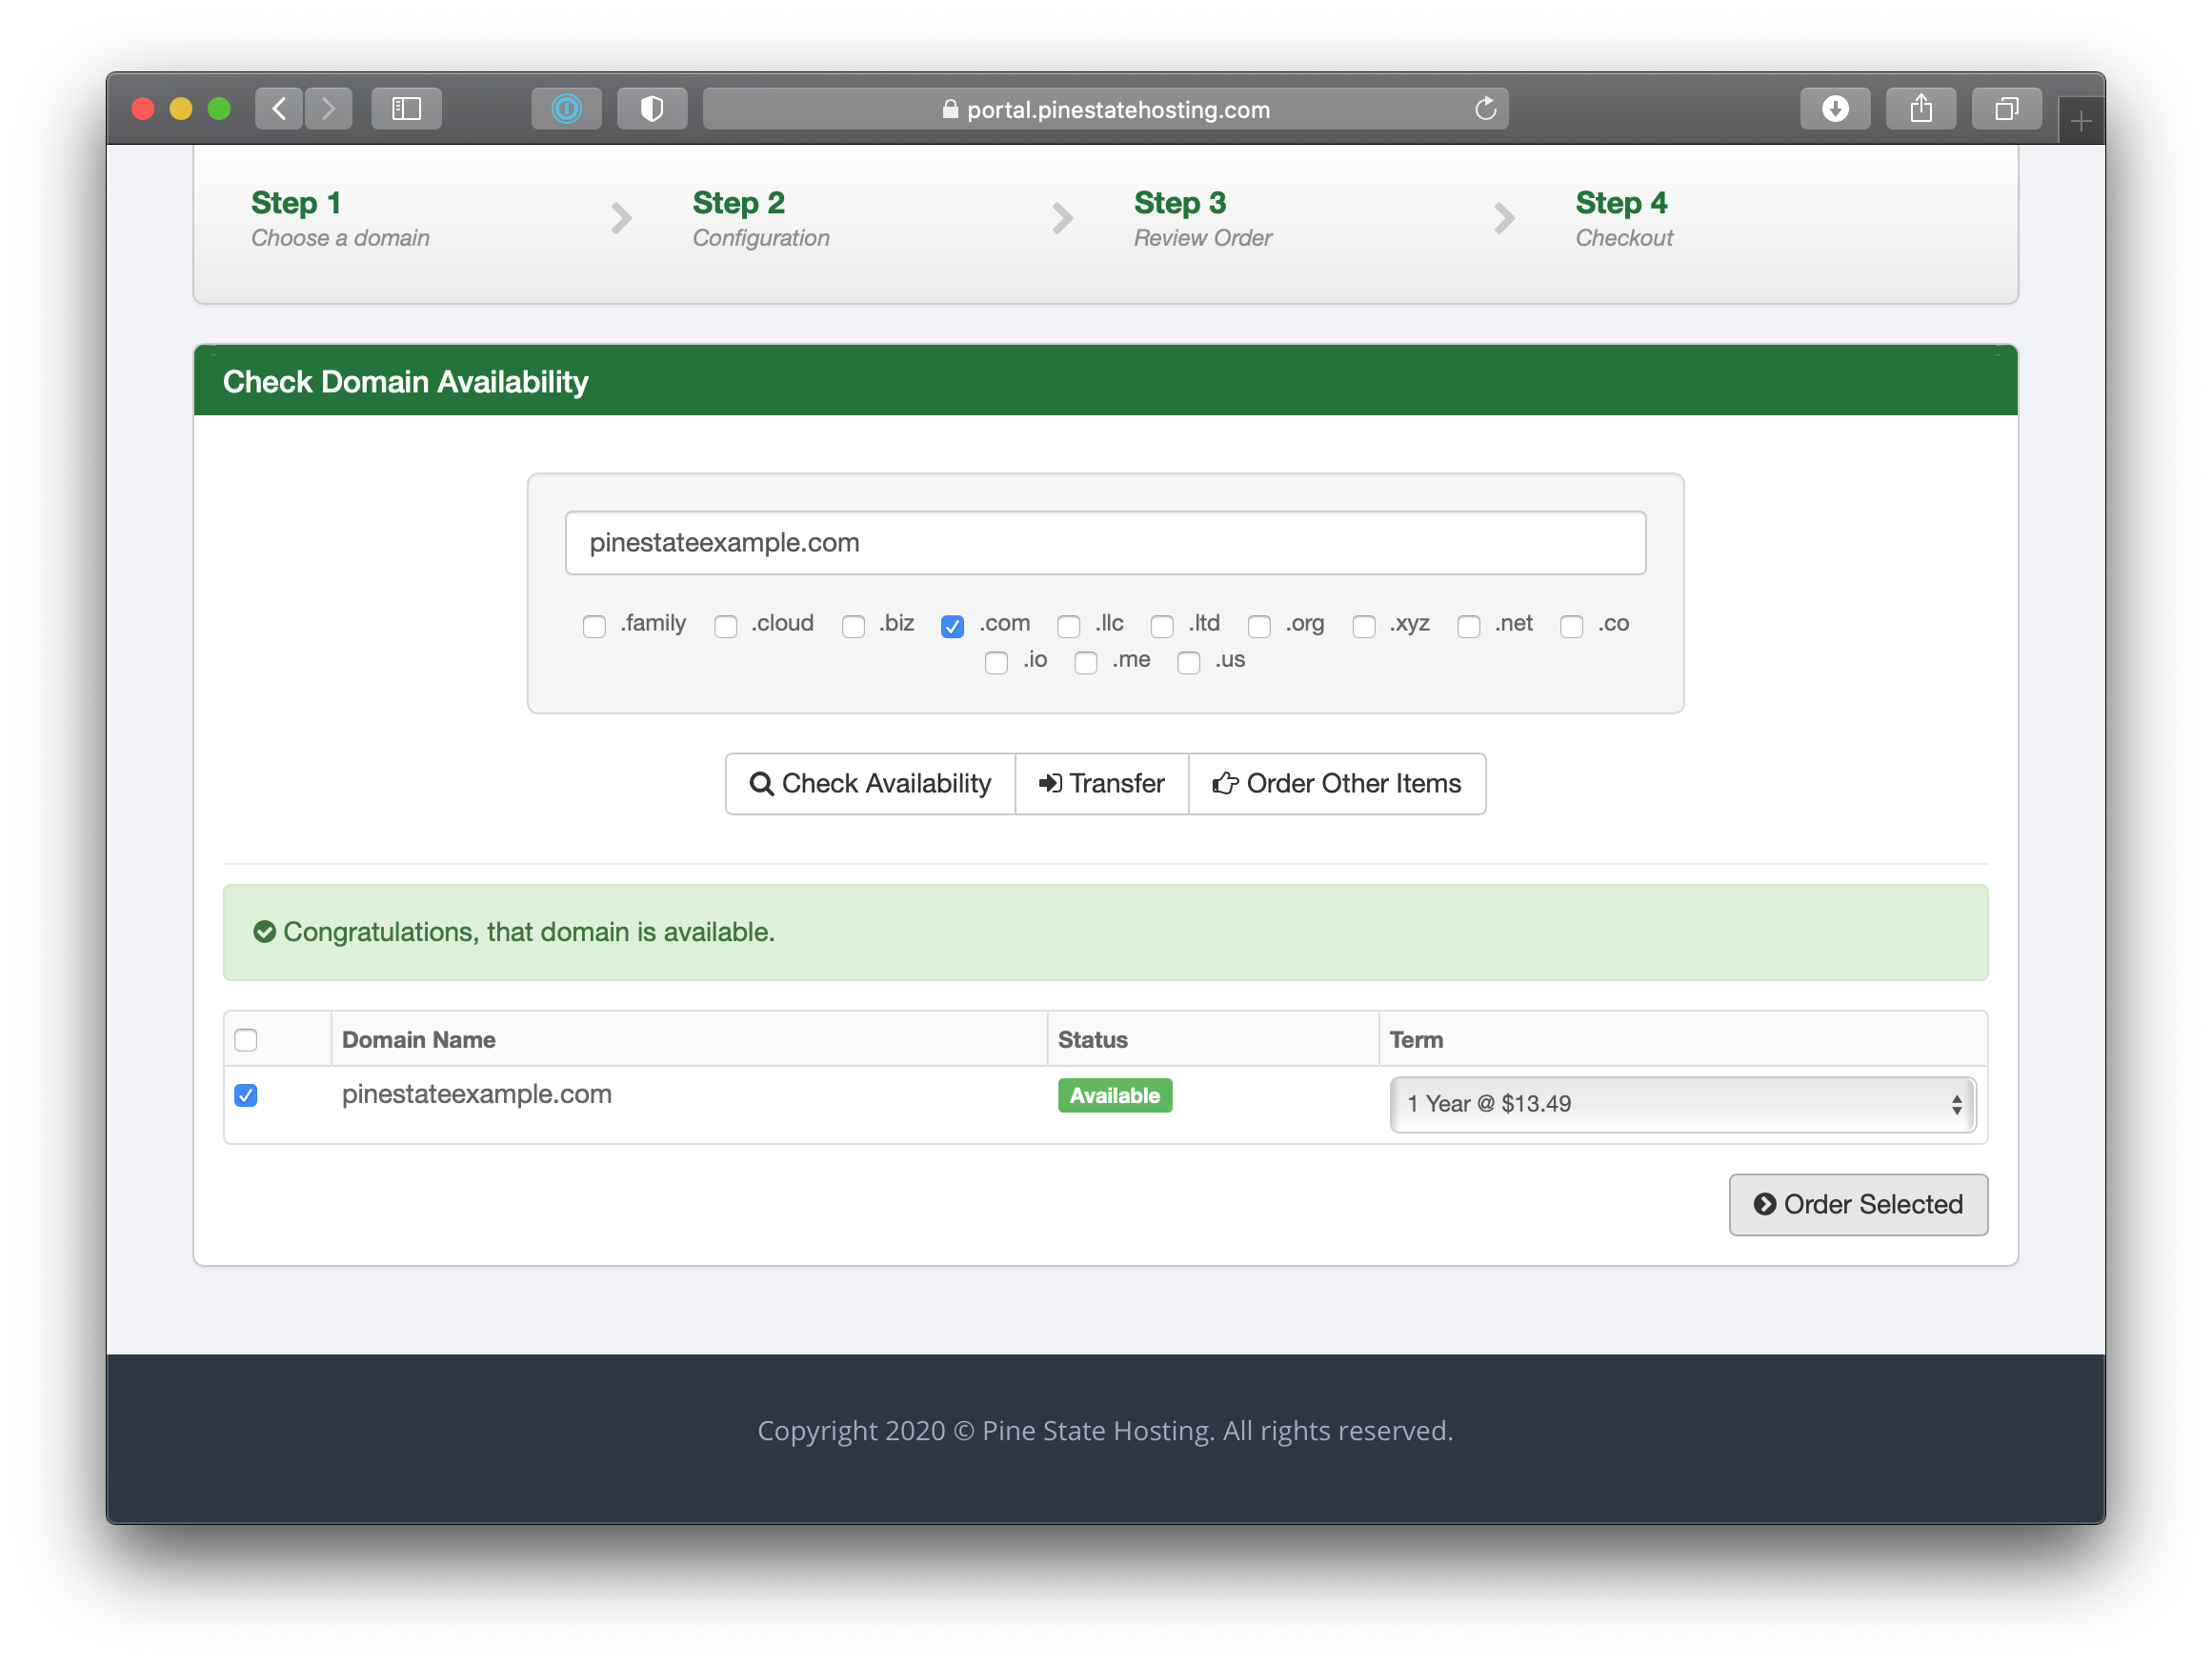
The first thing you'll need to do is pick out a domain name for your website. If already have a domain name, you can transfer it to Pine State Hosting or point it to Pine State Hosting servers. If you would like to purchase a new domain name, use this page to search for a domain name that you like. Once you find the domain name that you like, add it to your cart by selecting the domain you want and clicking on "Order Selected."
This next page allows you to change the settings of your domain, by default we've already filled out everything you need, so you can click continue.
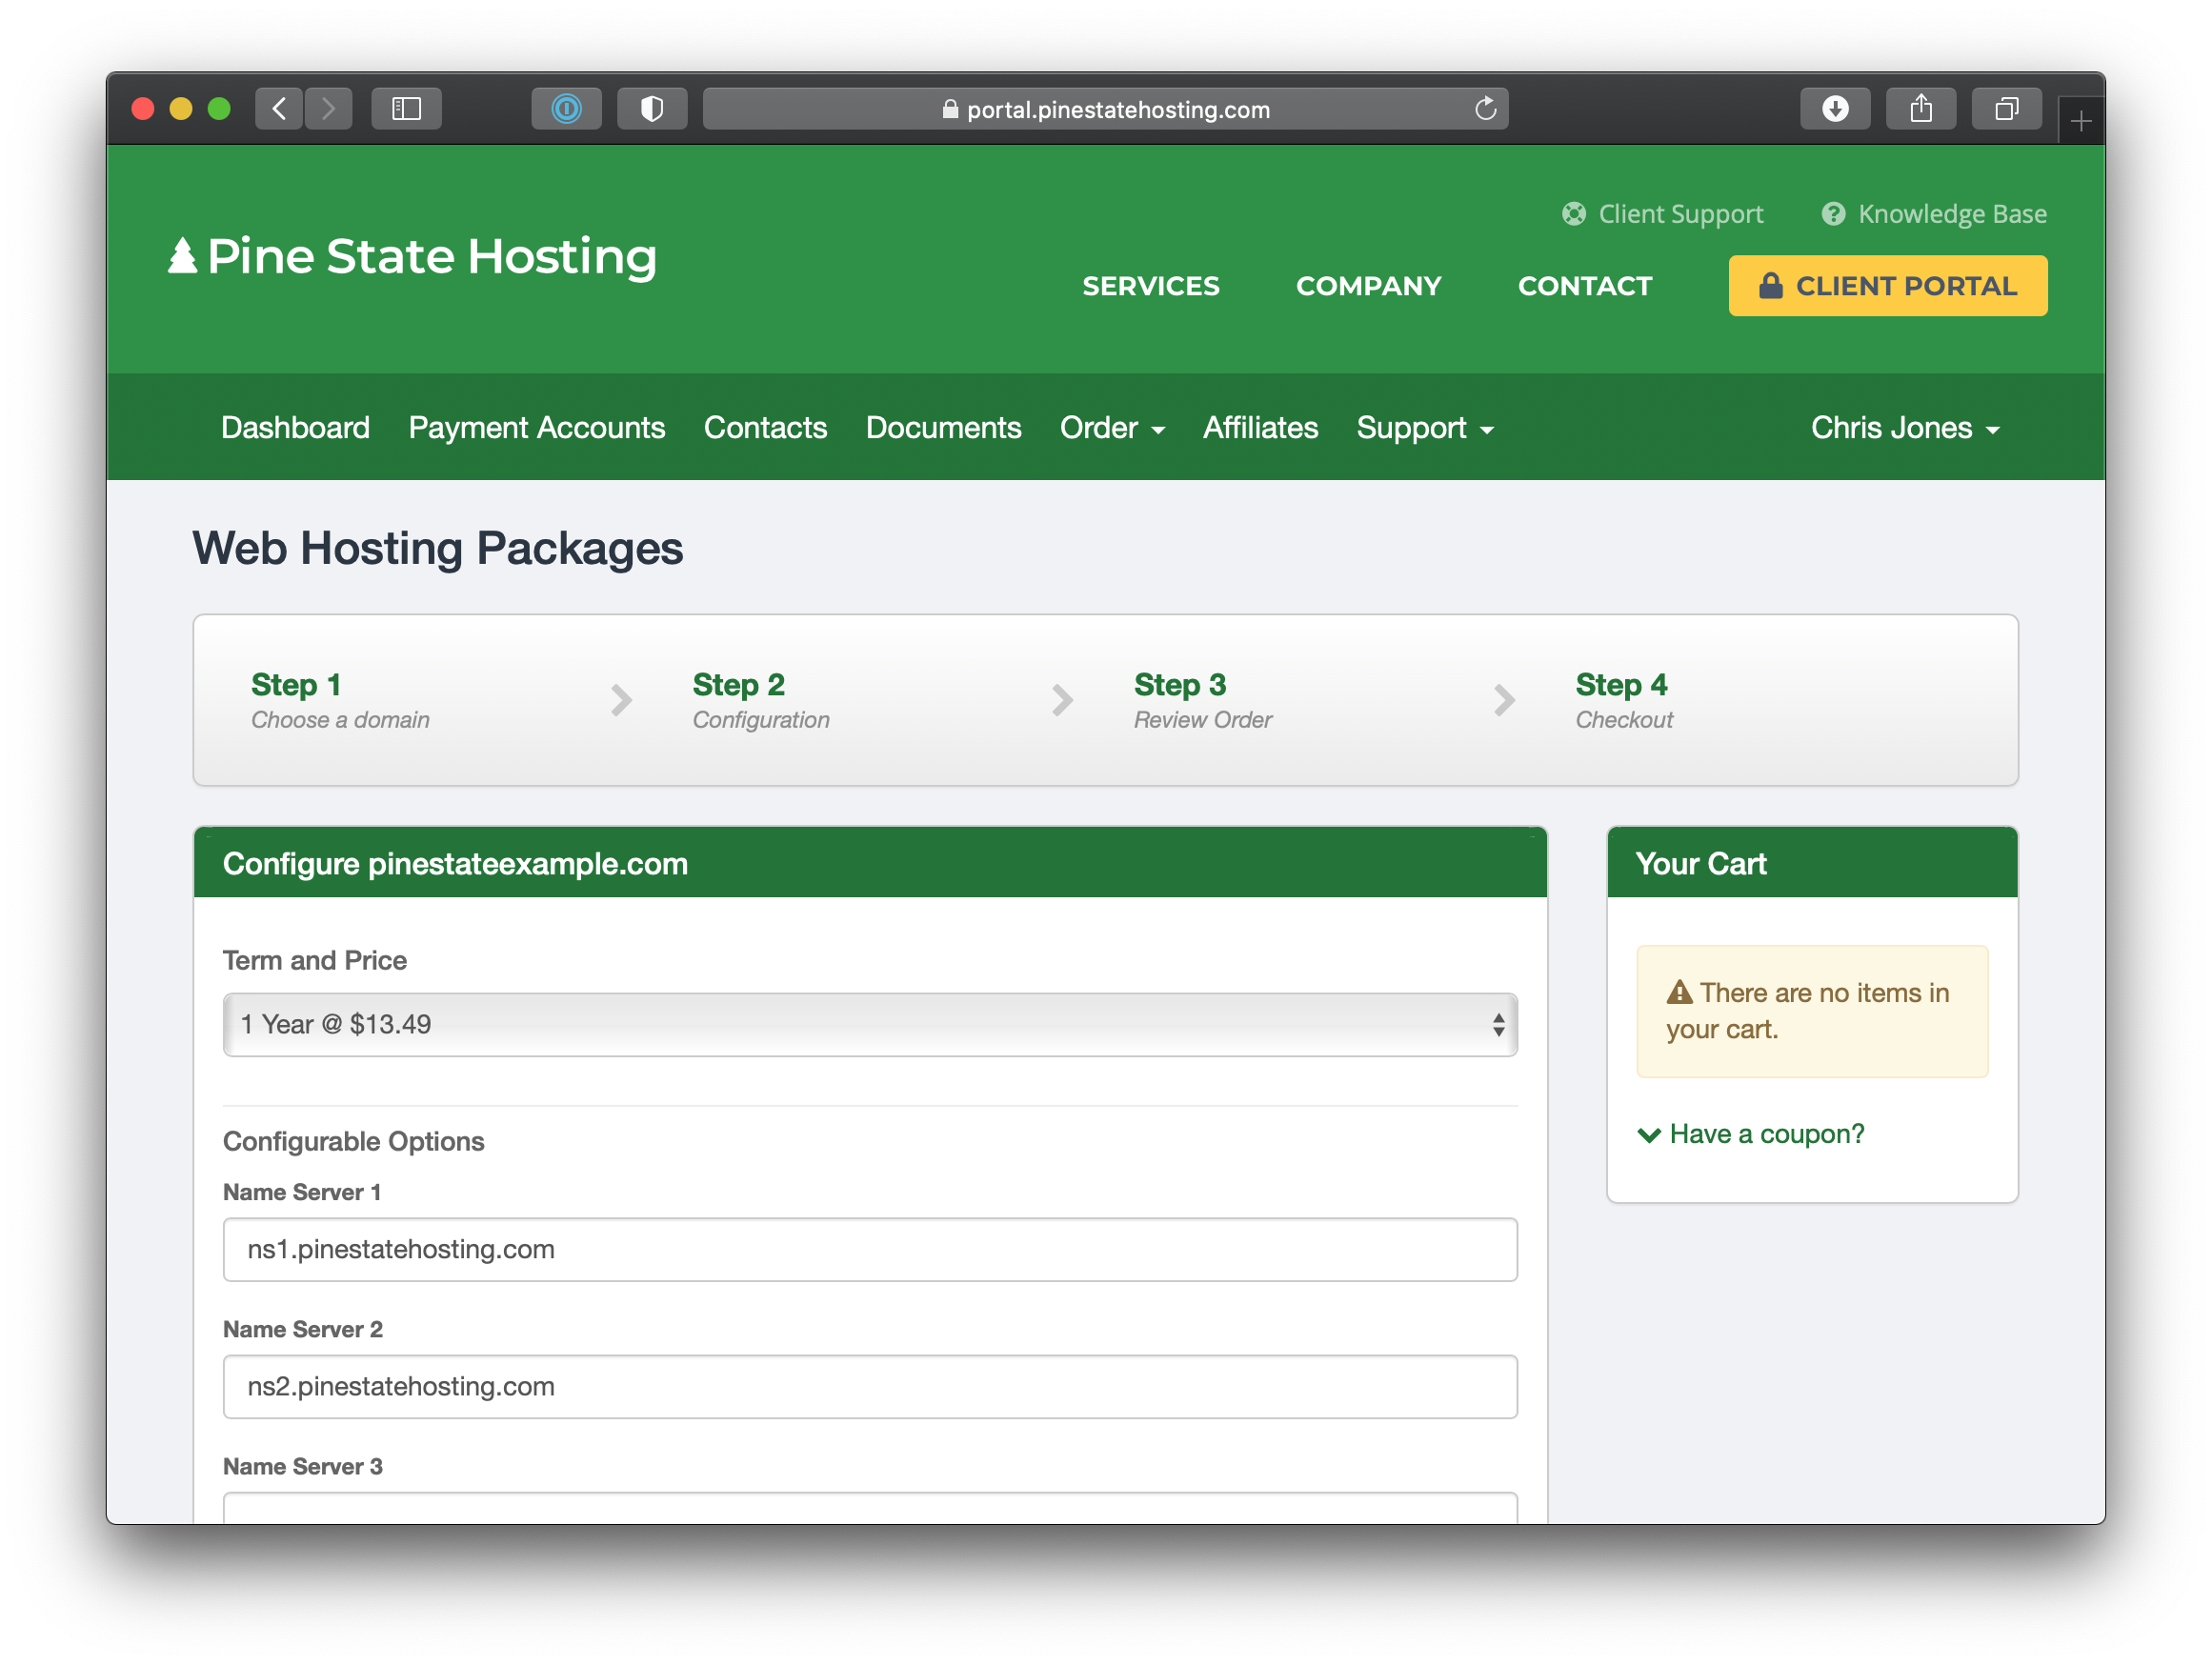
On this next page, select the specific hosting package that you want. We provide a variety of different packages to help suit most needs.

After selecting the specific hosting package that you want, you're presented with a couple of configuation options. If you want Wordpres to come installed automatically, seleect Wordpress from the available options and provide a username and password that you will use to login to your new Wordpress installation.
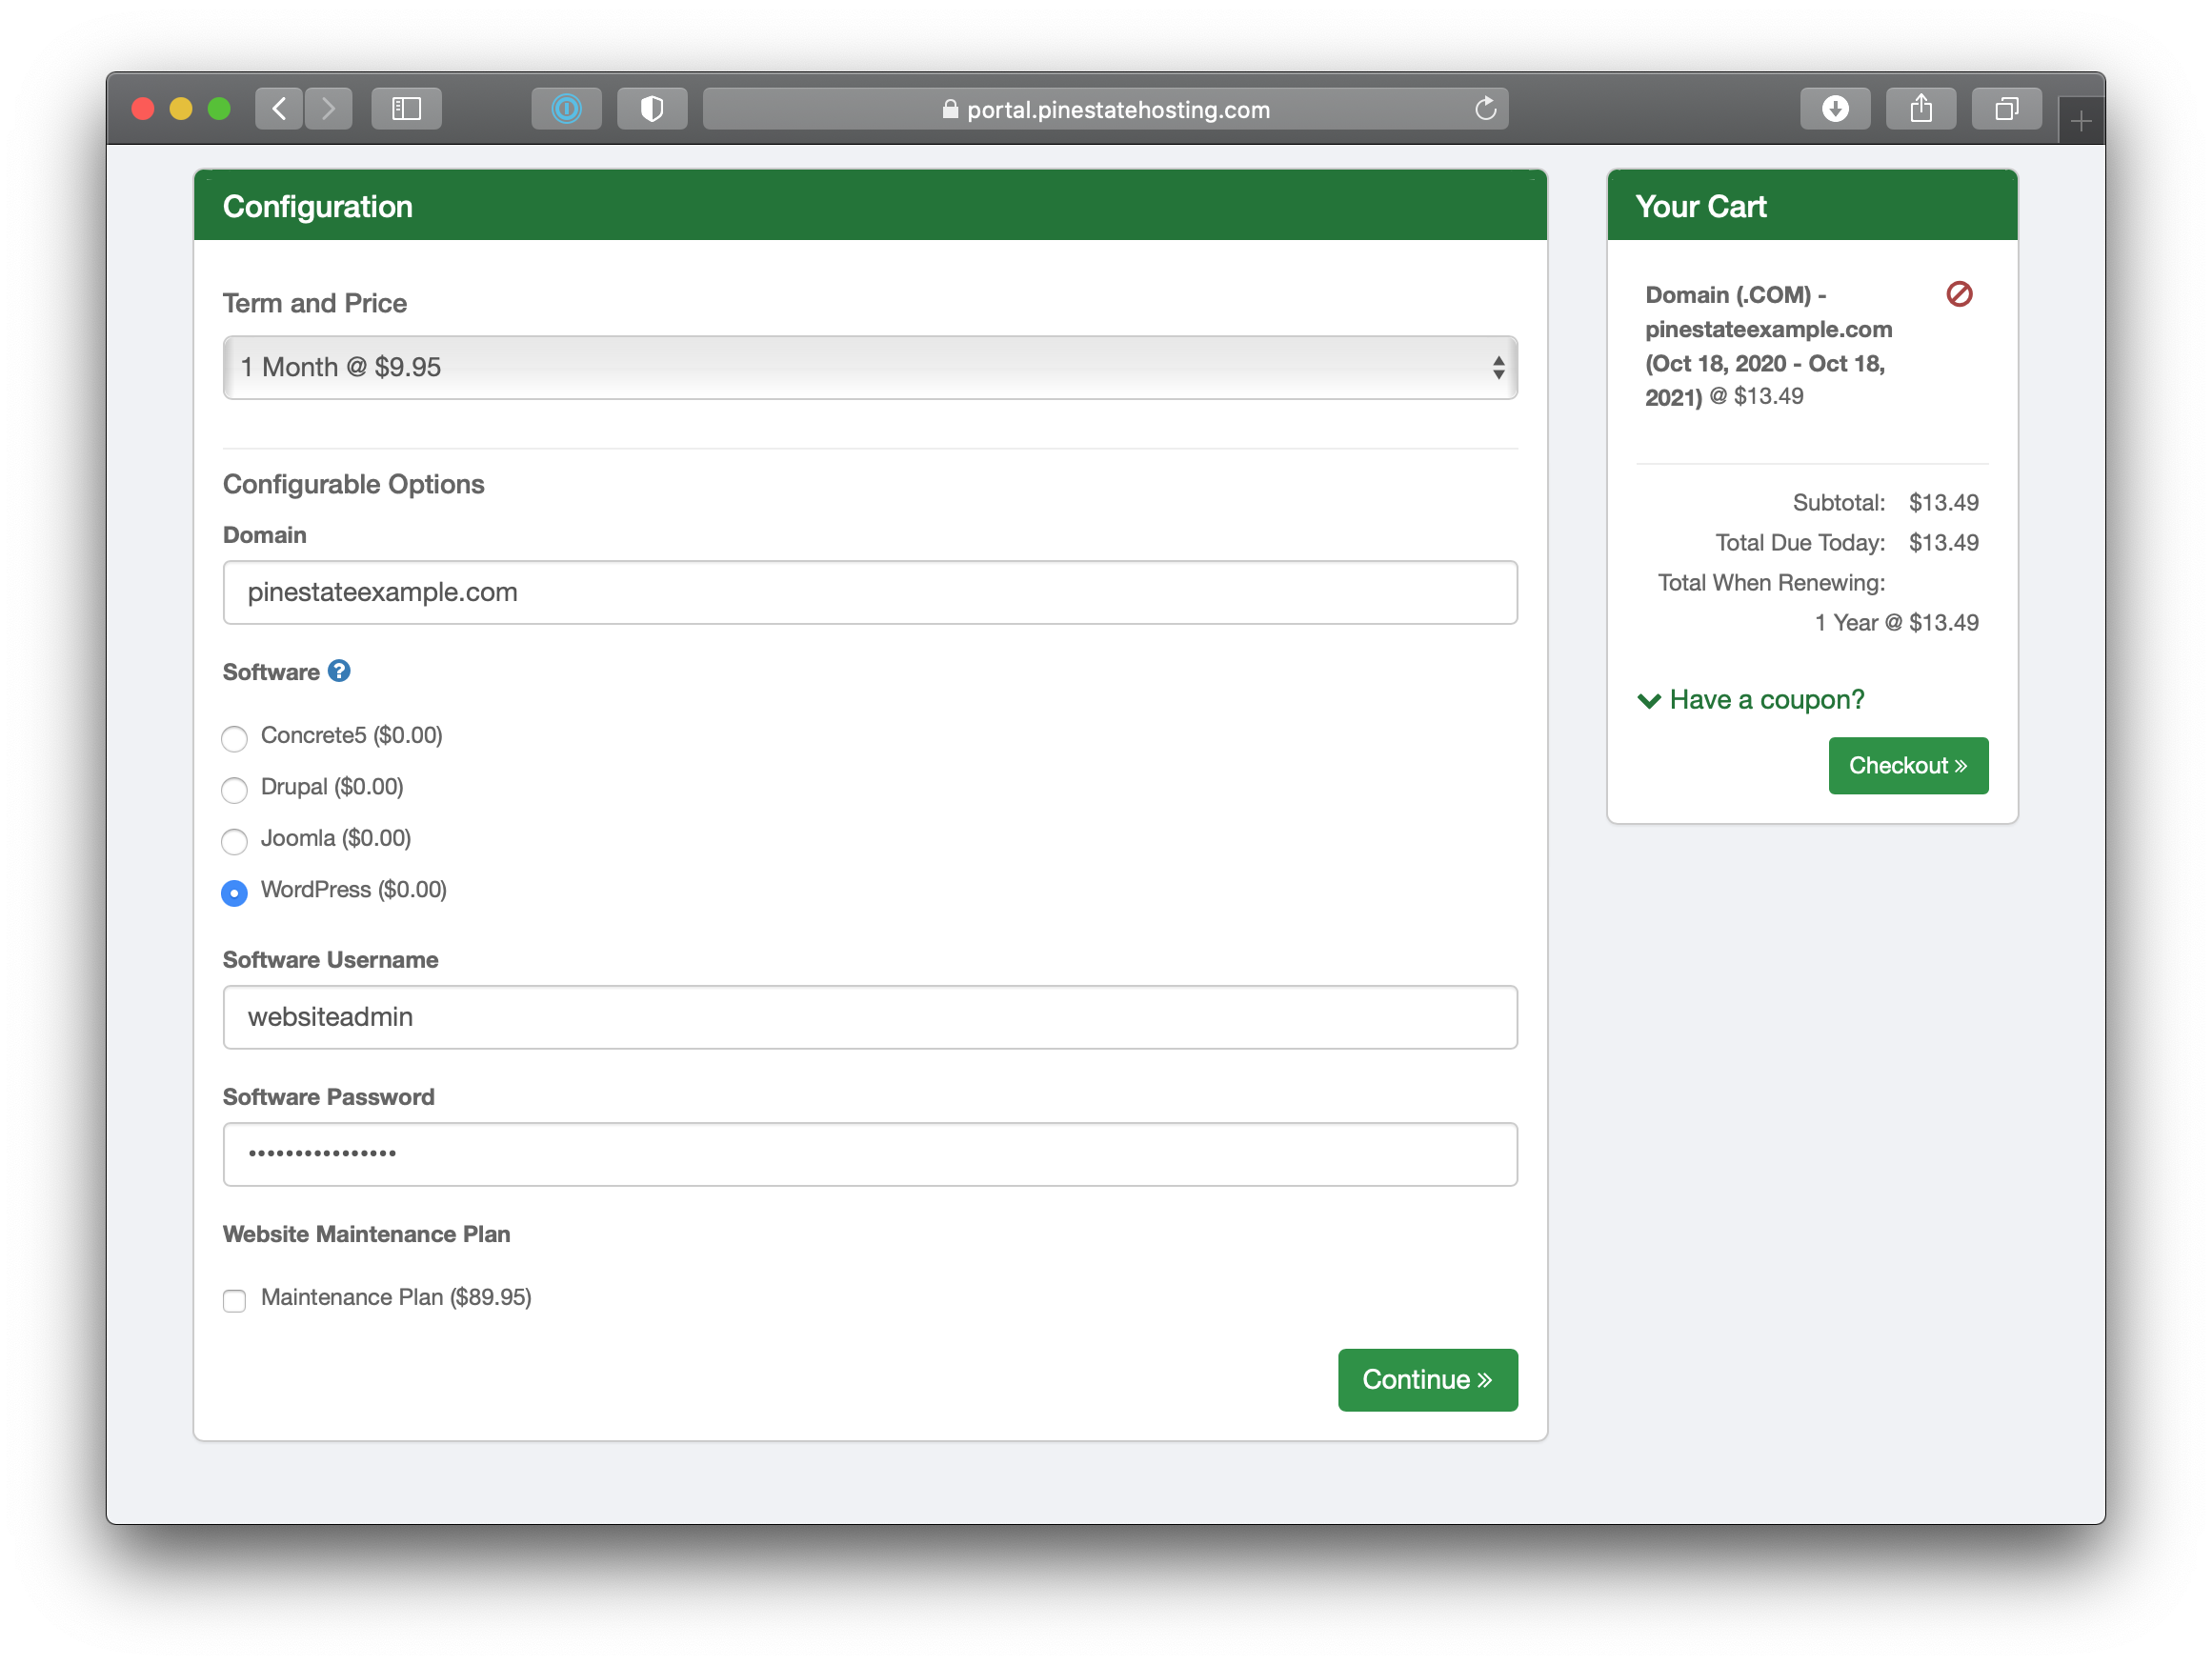
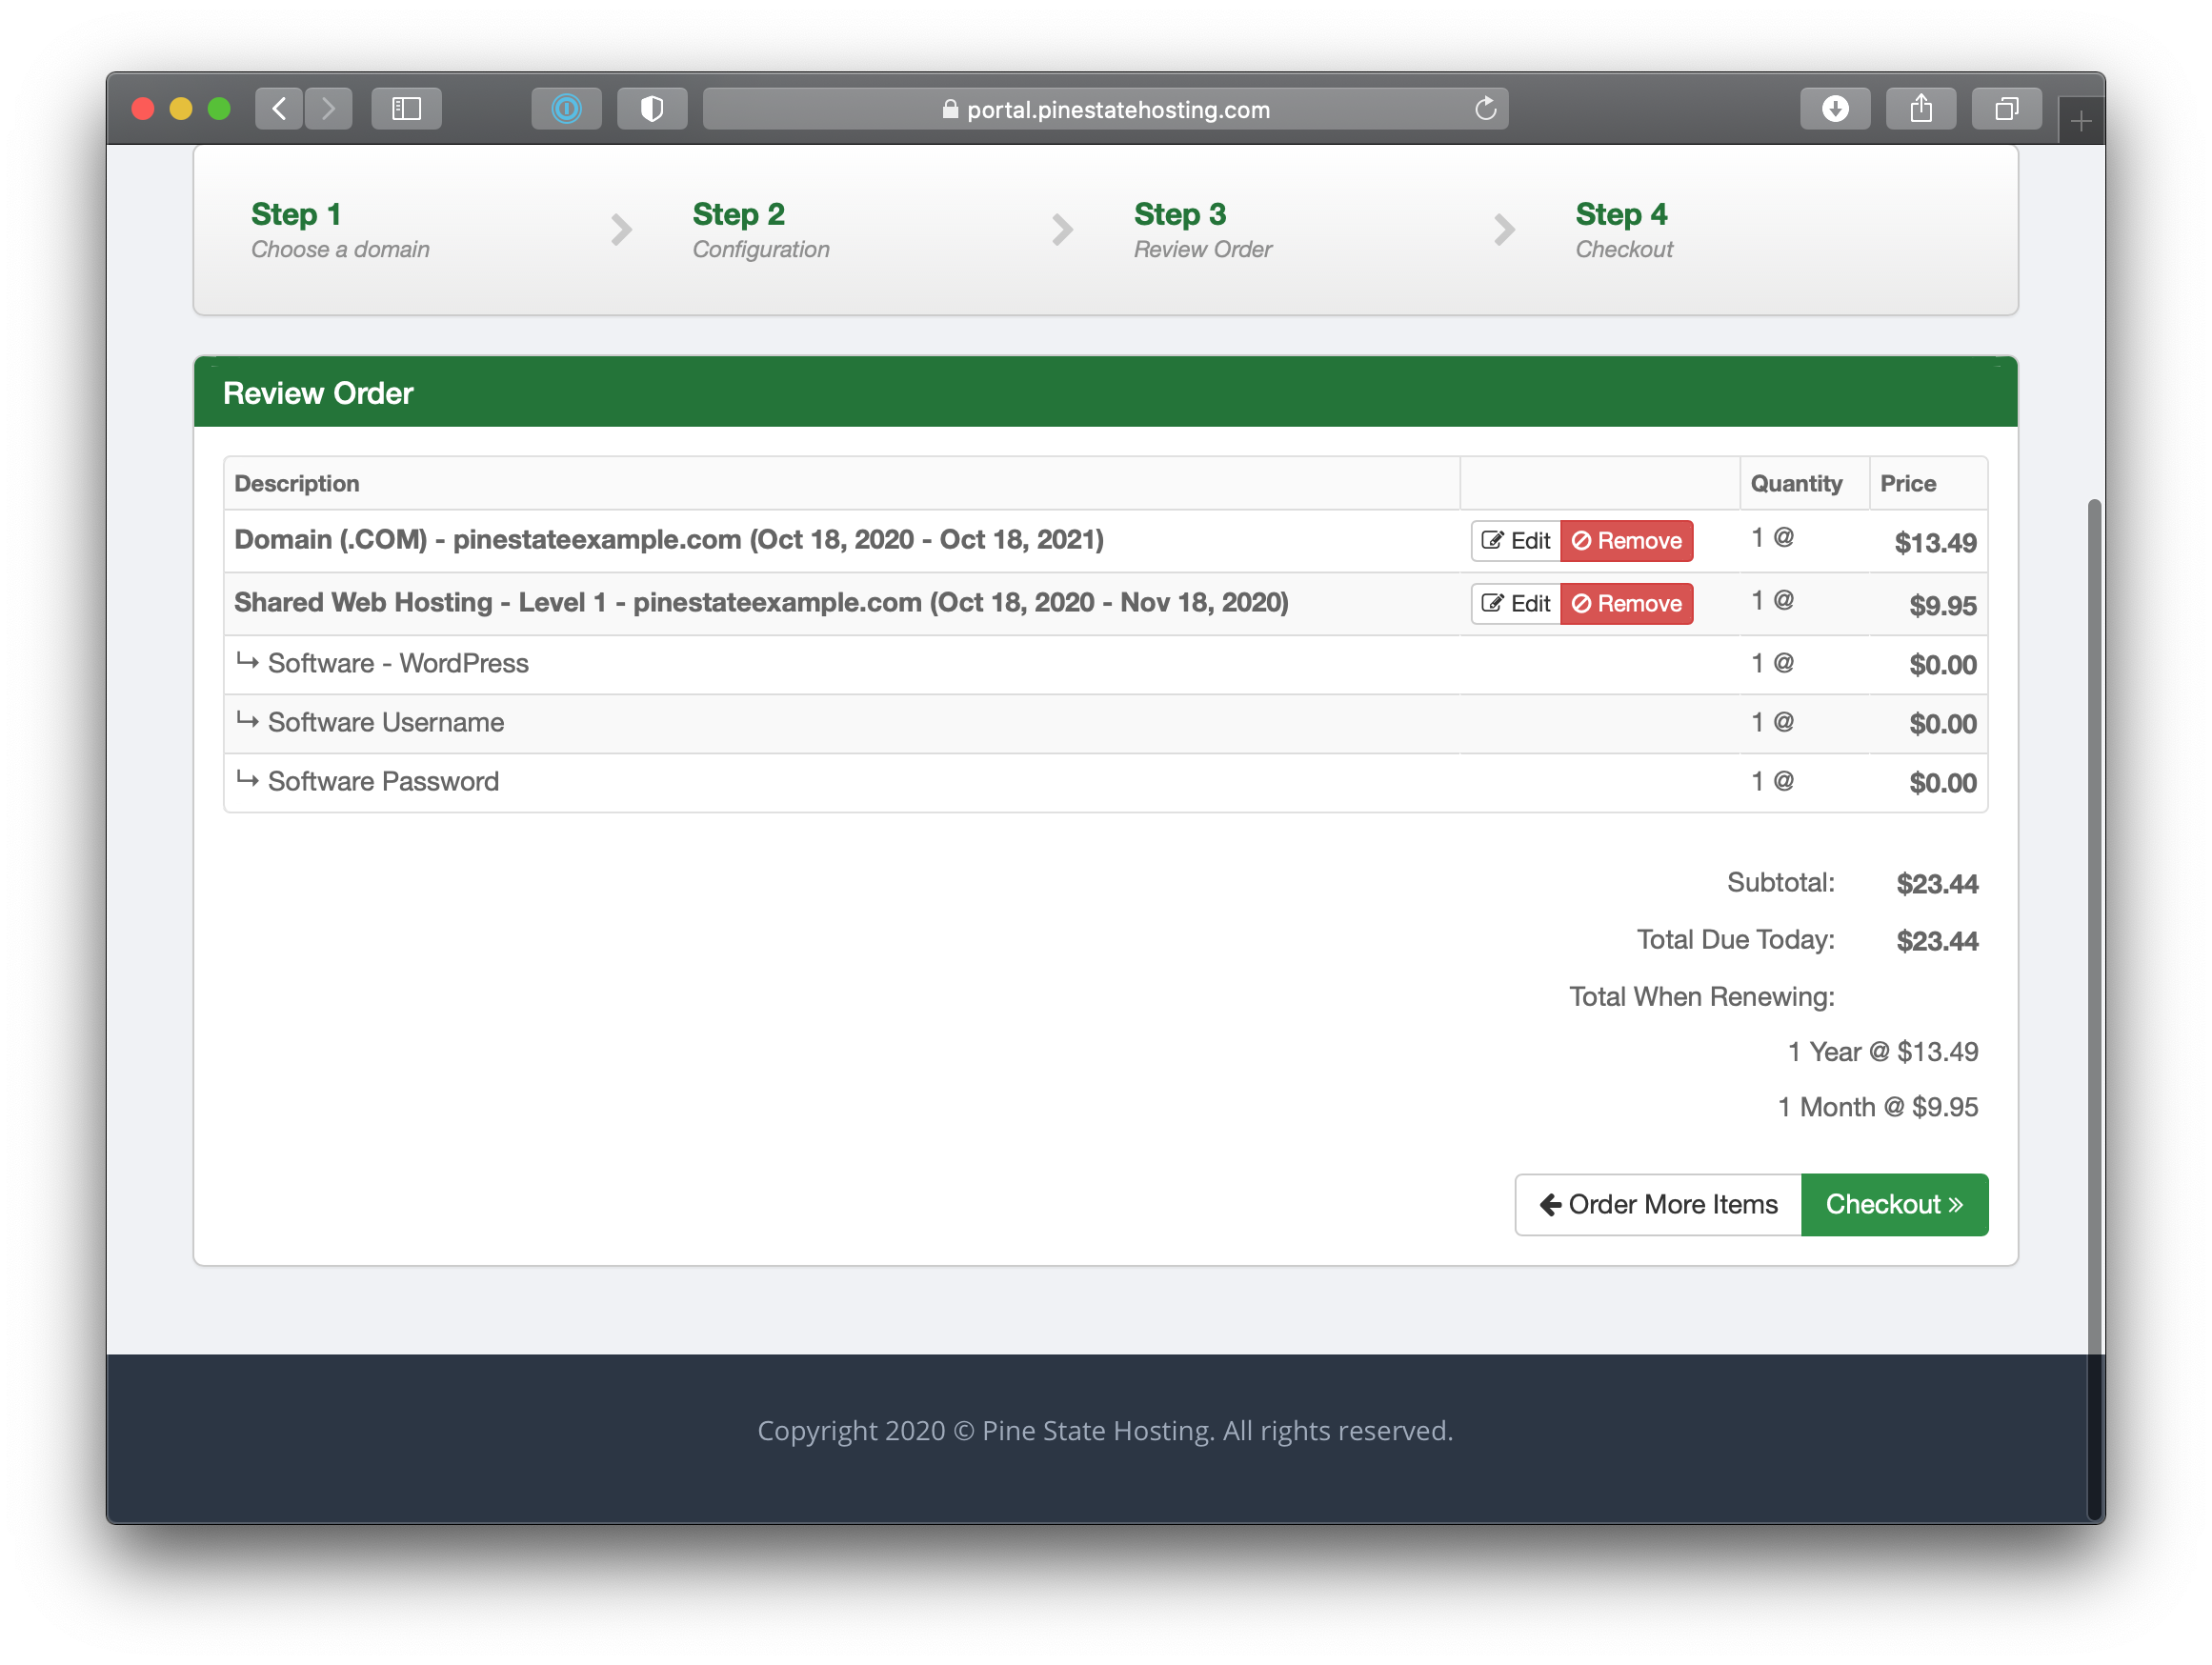
Finally, click on continue to review your order. Once your ready to purchase, click on Checkout. If you haven't already added your credit card to your client profile, you'll be asked to fill out this information before submitting your order. Once your order is approved and processed you will recieve several emails providing you all of the information you need to get started.